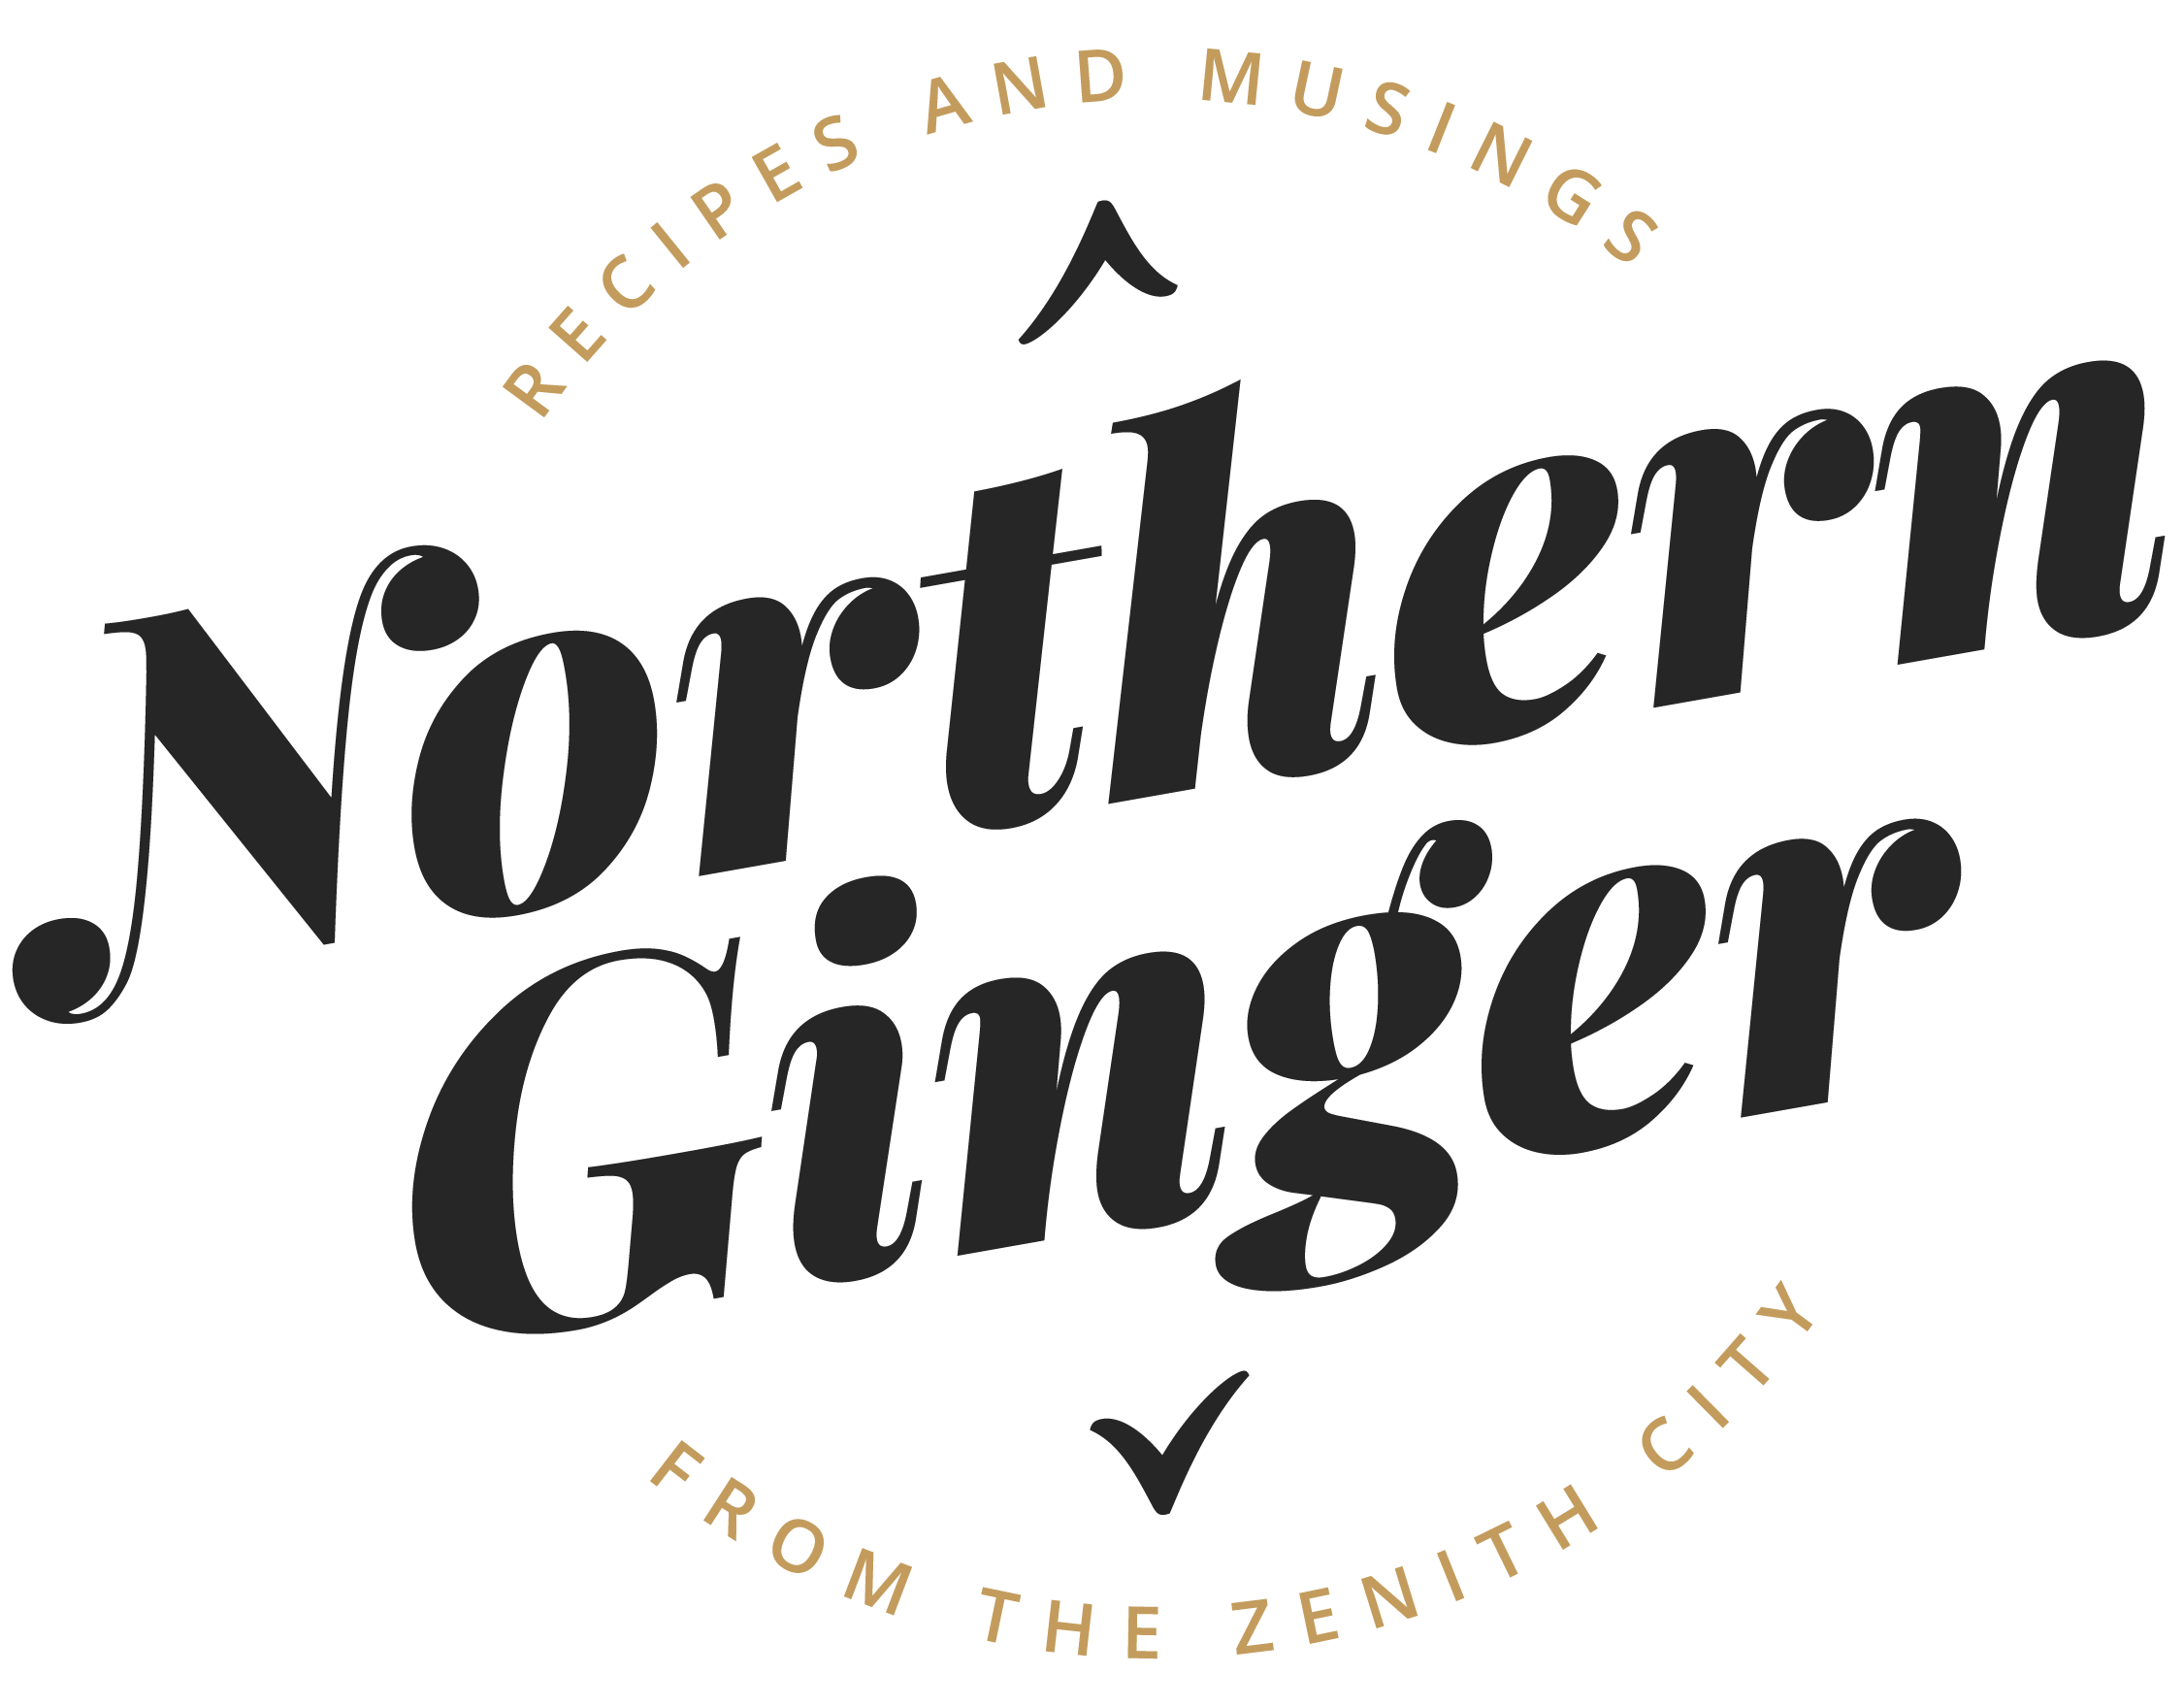
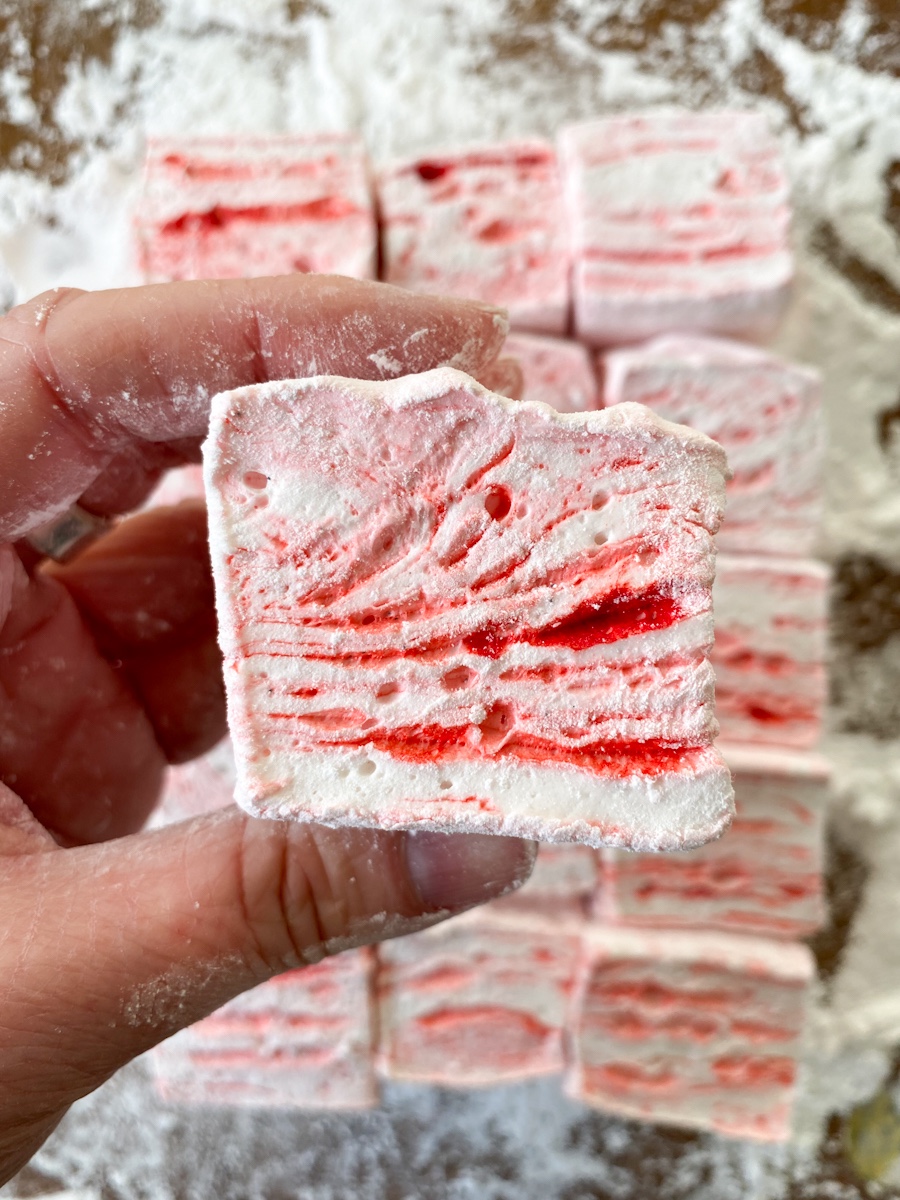
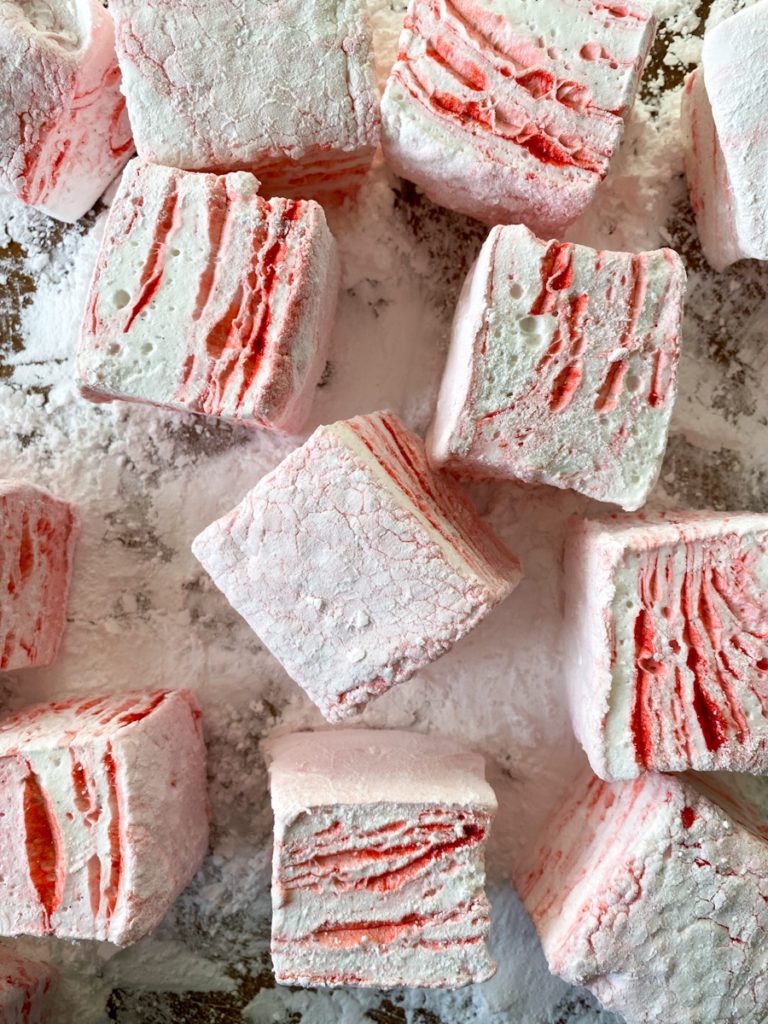
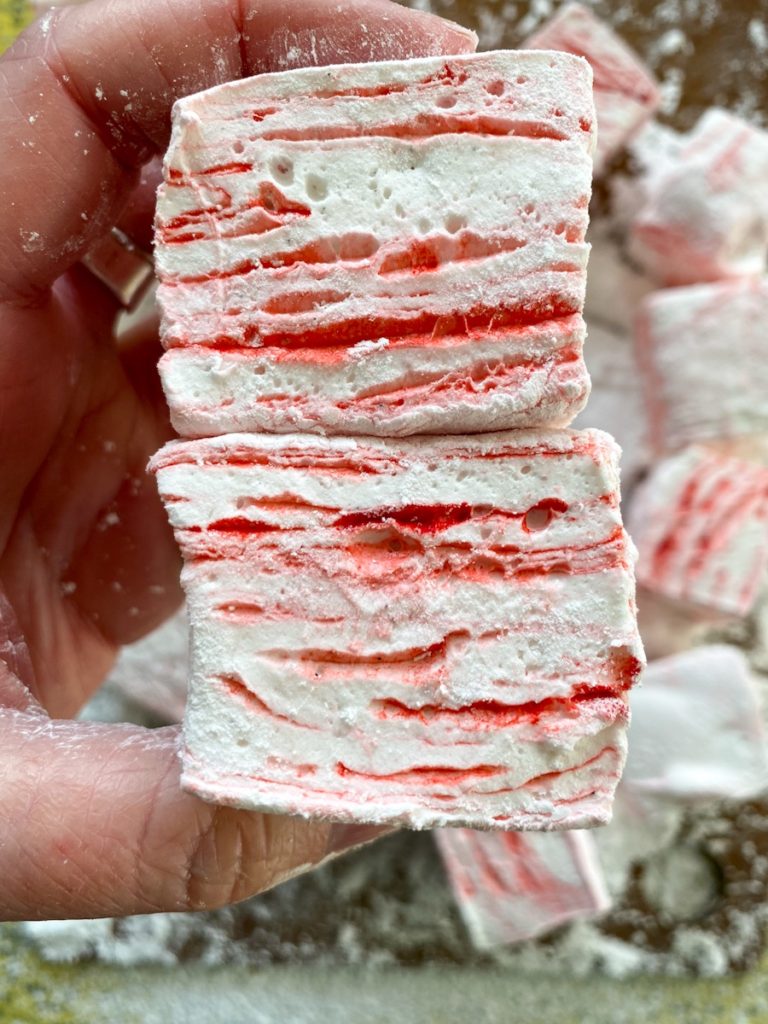
Peppermint Swirl Marshmallows
Happy Christmas week! (And Happy Saturday to those who don’t celebrate!) This weekend I’m finishing up my holiday baking, picking up a few last-minute gifts, and wrapping presents. Even though everything else is different this year, the one thing that hasn’t changed is that I’ve still managed to give myself way too much to do! There are just so many delicious holiday treats I want to make that I can’t bring myself to pare down my list. These peppermint swirl marshmallows, for instance, are so delicious that I’ve already made them twice.
They are the perfect thing to add to your Christmas morning cup of cocoa or coffee, roast in the fireplace on a chilly night, or eat by the handful while you watch Hallmark holiday movies. (Have I done this? Maybe. Did I regret it? Absolutely not.) I made these for the first time last year, and now December just wouldn’t be the same without them.
Homemade Marshmallows = Infinitely Better Than Store-Bought
If you’re thinking, “Making marshmallows sounds like a lot of work, why not just buy them?”, I get it. And you certainly could just buy them. But where’s the fun in that?
In my mind, if you’ve never tried a freshly made marshmallow, you haven’t fully lived. As with a lot of baked goods and candies, they are SO much better homemade. Like, infinitely better. Astronomically better. It’s like they’re a completely different thing than that bag of jet-puff ‘mallows you buy at the store.
They’re not that difficult to make either. You’ll definitely need a stand mixer for this recipe—I don’t care how ripped you are, you won’t get them as fluffy as they need to be without the aid of a motor. You’ll need a candy thermometer too, or an instant-read thermometer that goes up to at least 240°F (I used this one by ThermoWorks) And if you’ve never used unflavored gelatin before, it can be a weird thing to work with—for instance, it smells a little funky. (But don’t worry, you won’t taste the funk in the end result.)
One note: there are certainly vegetarian replacements for gelatin out there, but I haven’t tried them so can’t comment on how similar they are to work with. If anyone has experience with using a replacement, feel free to leave a comment letting us know what you used and how it worked for you! And also: if you don’t want to use the red food coloring, feel free to leave it out—they’ll be just as delicious without it, albeit a little less festive.
Peppermint Swirl Marshmallows For the Win
To make these beauties, I adapted Ina Garten’s Homemade Marshmallows recipe a bit. I replaced some of the vanilla with peppermint extract (some, not all—the vanilla makes the peppermint taste creamier), and opted for vanilla bean paste instead of vanilla extract
I also used a smaller pan (8×8 instead of 9×13) to create huge, super-thick marshmallows. If you’re going to make homemade marshmallows, then just go all out and make them huge, right? (Feel free to use a bigger pan or cut them smaller though if you prefer.)
Other than that, I followed Ina’s recipe and method. You bloom the gelatin in water, make a sugar syrup, then pour the hot syrup into the gelatin while you beat it with a whisk attachment. The result is a fluffy, sticky, delicious mess that you pour into a powdered-sugar-lined pan, then allow to sit out overnight (uncovered) to dry out a bit. It’s a weird thing to just leave something uncovered on the counter overnight, but they turn out beautiful.
If you’ve never made marshmallows or candy before, it can seem a little intimidating at first, but once you do it you realize it’s really not that complicated. And you’re left with this deliciousness:
Want homemade candy, but not ready to wrangle hot sugar syrup? Try your hand at making homemade truffles instead with my Irish Coffee Truffle recipe (swap the whisky and coffee for 1/2 tsp peppermint extract and 1 tsp vanilla for a chocolate-mint truffle dream!). Or, if you’re like me, and want to fill up your day with treat-making, do both. 🙂
This will be my last post for 2020, but I have some fun things planned for next year, and kind of a big exciting thing to unveil in January for my two year blogiversary! Stay tuned.
Wishing you all a happy and safe Christmas and end of 2020!

Peppermint Swirl Marshmallows
Equipment
- Candy Thermometer or other high-temperature thermometer (needs to go up to 240°F)
- Stand Mixer and Whisk Attachment
Ingredients
- 3 packets unflavored gelatin
- 1/2 c cold water
- 1 1/2 c granulated sugar
- 1 c light corn syrup
- 1/4 tsp kosher salt
- 1/2 c water
- 2 tsp vanilla bean paste or vanilla extract
- 1 tsp peppermint extract
- few drops red food coloring
- powdered sugar, for dusting
Instructions
- Use a sifter or sieve to generously dust an 8×8 or 9×9* non-metal baking dish with powdered sugar. Set aside.
- In the bowl of a stand mixer fitted with a whisk attachment, combine the gelatin with the 1/2 c cold water. Let it rest while you make a sugar syrup.
- In a small saucepan (1 1/2-2 qt), combine the granulated sugar, corn syrup, salt, and 1/2 c water. Cook over medium heat, stirring until the sugar dissolves.
- Then turn the heat to medium-high or high and cook (not stirring) until the syrup reaches 240°F on a candy thermometer. (Note: if it looks like it might boil over, reduce the heat a bit)Remove from heat.
- With the stand mixer beating on low speed, gradually pour the hot sugar syrup into the gelatin mixture. Once all of the sugar syrup is added, raise the speed to high and beat until the mixture is thick and fluffy. (This took me a little under 10 minutes, but it could take up to 15).
- Add the vanilla bean paste or extract and the peppermint extract, and continue beating until thoroughly combined.
- Add a few drops of red food coloring, and use a silicone spatula to gently swirl the color through the marshmallow mixture.
- Pour into the prepared pan and use the spatula to smooth the top, making sure the mixture fills into the corners. Use the sifter/sieve to dust the top of the marshmallows with a good layer of powdered sugar.
- Let it stand overnight at room temperature, uncovered to allow the marshmallows to cool and dry out a bit.
- The next morning, turn the marshmallows out of the pan onto a cutting board. If the edges of your pan are rounded, and you want straight-sided 'mallows, cut the edges off of the marshmallow slab first (a snack for the chef!).Then cut into 16 marshmallows (or more if you want smaller 'mallows). Tip: dust the knife with powdered sugar in between cuts to keep it from sticking too much.
- Store marshmallows in an airtight container at room temperature, preferably covered in powdered sugar (to keep them from getting too dry). Stored like this, marshmallows can last for 2-3 weeks.
Notes


8 Comments
Connie
Can I pipe this mixture into shapes according to occasions? TIA
Jamie
I haven’t tried it, but I don’t see why not. If you try it, let us know how it turned out!
Pingback:
Pingback:
Pingback:
Pingback:
Michael
These marshmallows are a divine inspiration. We are going to fire up the new stand mixer and give the recipe a try! (Might make it a double….;)
Jamie
So glad you’re giving the recipe a go!! Homemade marshmallows are a revelation—store-bought ones really pale in comparison. Let me know how yours turn out!