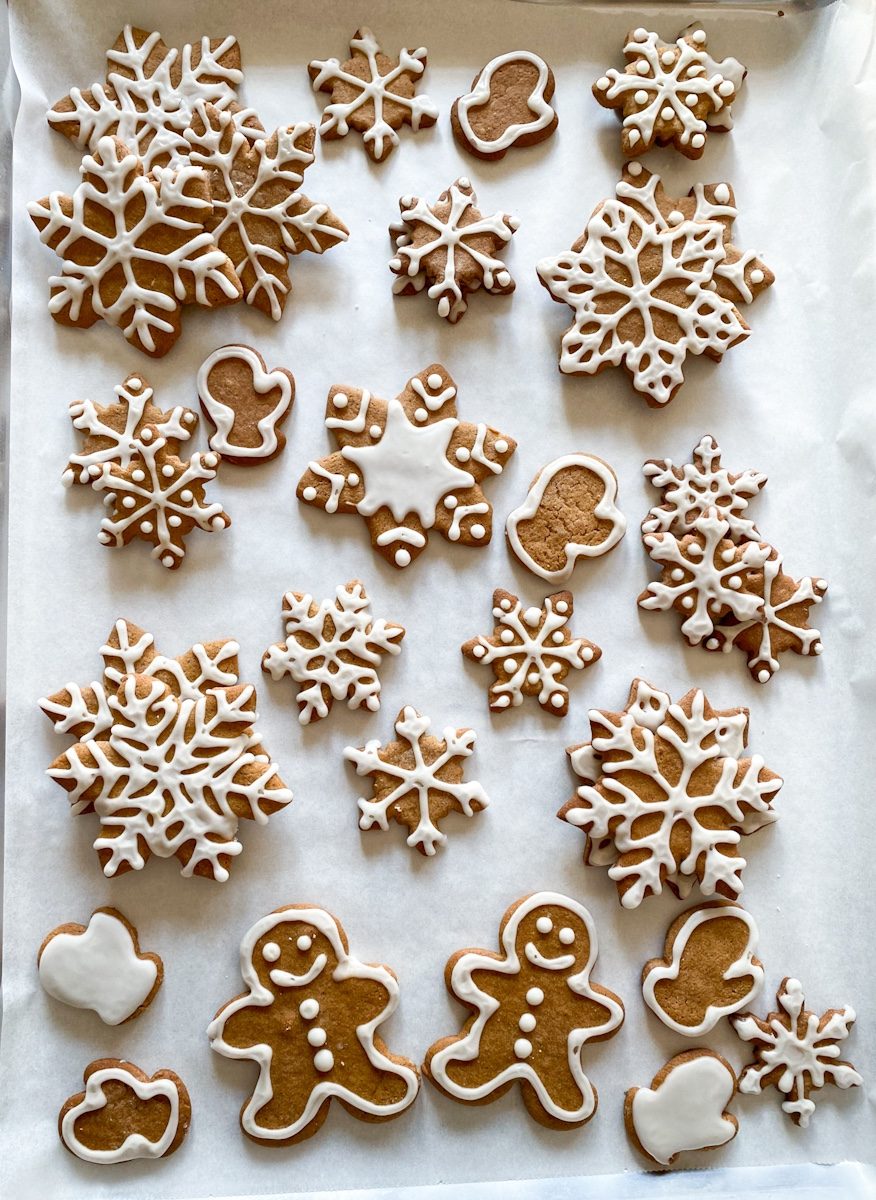
Old-Fashioned Gingerbread Cookies
Happy December and happy holiday baking season! As a baker, this is undoubtedly my favorite month of the year for making treats. Since I give cookies as Christmas gifts, I get to bake a TON of treats over the course of a few weeks. It’s SO much fun! Since Thanksgiving, I’ve already made 6 kinds of cookies, and as I’m writing this there’s another batch of dough chilling in the fridge and candied grapefruit peel drying on my counter. I’m basically in holiday cookie heaven.
While I like to try lots of new recipes each year, there are a couple of family favorites that just have to happen every December. One of them is my Grandma’s Sour Cream Sugar Cookies. The other is one from my Great-Grandma’s recipe box — Old-Fashioned Gingerbread Cookies.

Crisp, Spicy, and Classic Gingerbread Cookies
This recipe makes a traditional crisp gingerbread, so if you’re looking for a soft gingerbread this isn’t it (I suppose you could make them softer by rolling the dough out thicker…but I digress). It’s also a cut-out cookie recipe— i.e., time-consuming, especially if you decorate them. If you’re in the mood for gingerbread flavors but want a soft cookie that’s less work to make, try these Soft Gingerbread Amaretti Cookies (they’re also GF, if that’s your jam), or these Molasses Cookies (another of my Great-Grandma’s favorites).
I love a crisp gingerbread cookie around the holidays. There’s just something about crunching into a perfectly spiced cookie that brings me back to childhood Christmases and my Grandma’s baking. And what is the holiday season without a little nostalgia?
I’m lucky enough to have a box of recipes from my Great-Grandma Rena. I was young when she died, but I remember sitting at her kitchen table enjoying the treats she always had on hand. The memory is just a snapshot, but it’s one that always makes me happy. So when I get to bake from her collection of recipes, I can’t help but sit with that memory for a moment.

An Update to the Original: Lemon Icing
I added a touch of myself to my Great-Grandma’s recipe though, in the form of a thick lemon icing. I love the flavors of gingerbread and lemon together, so for me it was an no-brainer. To create the icing, I started with this icing recipe from the Kitchn. I added some lemon juice and tweaked it a bit until I had it just how I wanted it: thick, sweet, and lemony. I’ve included the icing recipe and instructions in the recipe notes, rather than as part of the main recipe, because you really could use any kind of frosting or icing on these cookies that you like. I just happen to like this one.
I piped my icing on with an Ateco #4 tip (a very small, round tip), but you could use a bag with the corner snipped off, or just spread it on with a knife. After piping this icing on, you leave the cookies sitting out, uncovered, at room temperature for a full 24 hours, or until the icing is completely dry. Then you can stack & store them without ruining the designs. These cookies can be stored at room temperature for a week or frozen for up to 2 months.
I do have to get a little bossy here for a minute before I get back to my holiday baking. There is one rule with old-fashioned gingerbread: You have to try at least one cookie fresh out of the oven (with or without icing). There’s nothing quite like fresh baked gingerbread cookies eaten while the kitchen is still full of the scent of cinnamon, ginger, and cloves (insert dreamy sigh).
I don’t make the cookie rules, I just enforce them.
Ok, I’ve blathered on enough for today. Gather your ingredients and get to baking, friends!
Happy Holidays!
Old-Fashioned Gingerbread Cookies
Ingredients
- 2/3 c vegetable shortening
- 1 c sugar
- 1 beaten egg
- 1/4 c molasses
- 2 c flour
- 3/4 tsp salt
- 1 tsp baking soda
- 1 tsp ground cinnamon
- 1 tsp ground ginger
- 1 tsp ground cloves
- Optional Lemon Icing (see notes)
Instructions
- Preheat oven to 350°F
- In a medium bowl, combine flour, baking soda, salt, and spices. Set aside.
- In the bowl of a stand mixer fitted with a paddle attachment (or in a large bowl using a hand mixer), cream shortening and sugar until well combined.
- Add egg and molasses and beat until well combined.
- Add dry ingredients and mix until no bits of flour are remaining.
- On a floured surface, roll dough out to about 1/8-in thickness. Cut as desired, and move cookies to a cookie sheet. Gather dough scraps into a ball and roll out again. Repeat until all dough has been used. Note: this dough can be a bit delicate, so be patient and careful as you're cutting and moving them.
- Bake for about 10 minutes (less if your cookies are quite small, more if they are larger shapes). You don't want them to get too dark, but a little browning on the bottoms and edges is fine.
- Cool on cookie sheets for about 5 minutes, then move to a cooling rack and let cool completely.
- Frost as desired (see notes for the icing I used in the photos). Store in an airtight container at room temperature for up to a week, or freeze for up to 2 months.
Notes


5 Comments
Pingback:
Pingback:
Pingback:
Pingback:
Pingback: