
Mud Pie Cake
Last month, I took a Creative Baking class online with monthly.com, taught by Christina Tosi of Milk Bar. It was such a fun class (and also a lot of work!), and I ended up with three new original recipes: Popcorn & Hot Chocolate Cookies, Brûléed Maple Latte Cheesecake Pie, and this Mud Pie Cake.
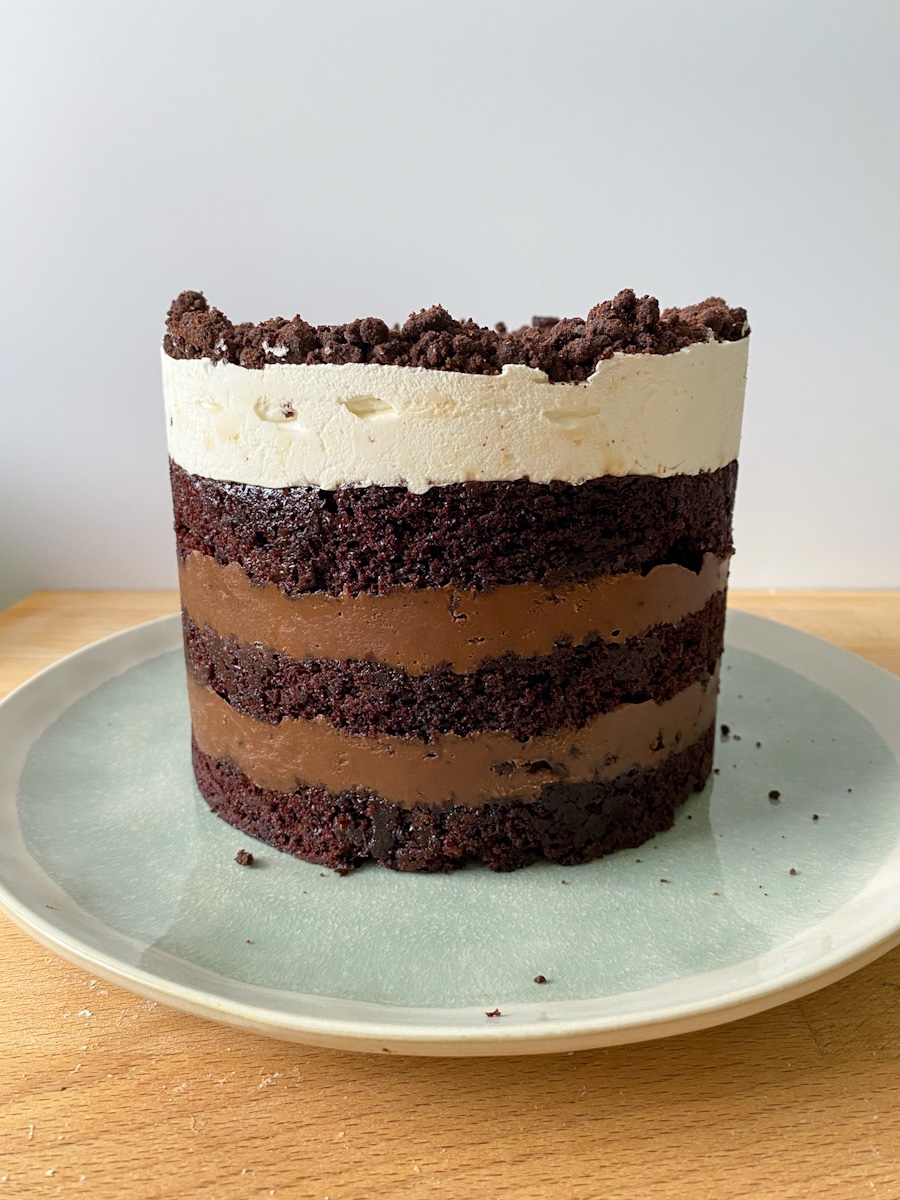
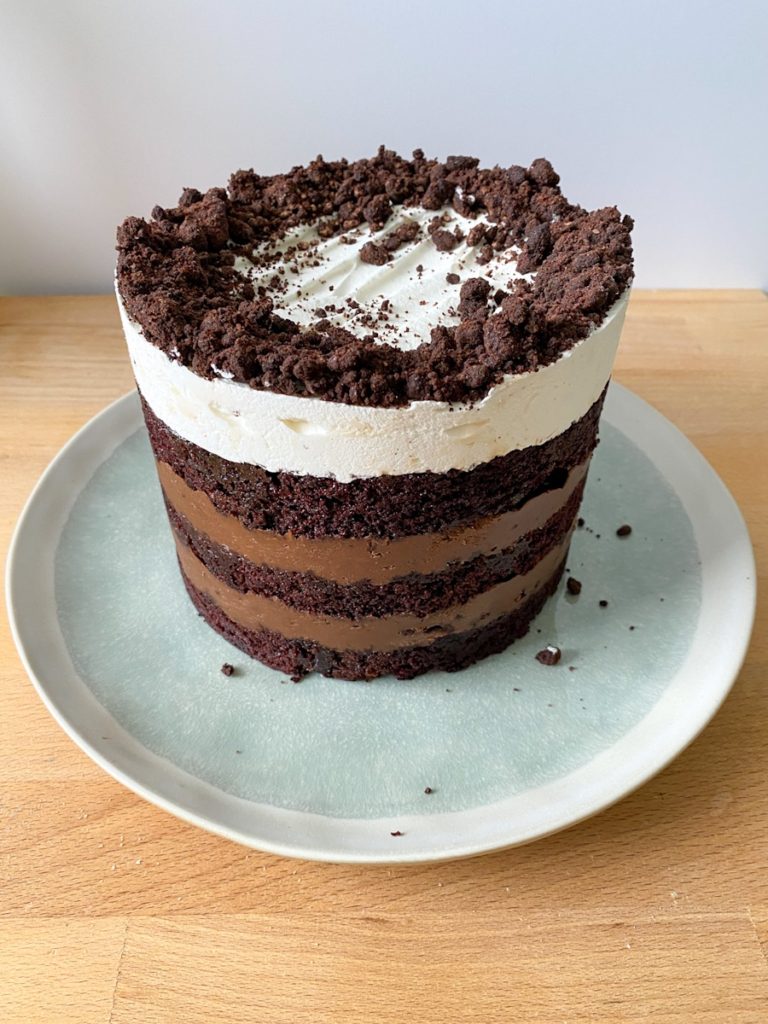
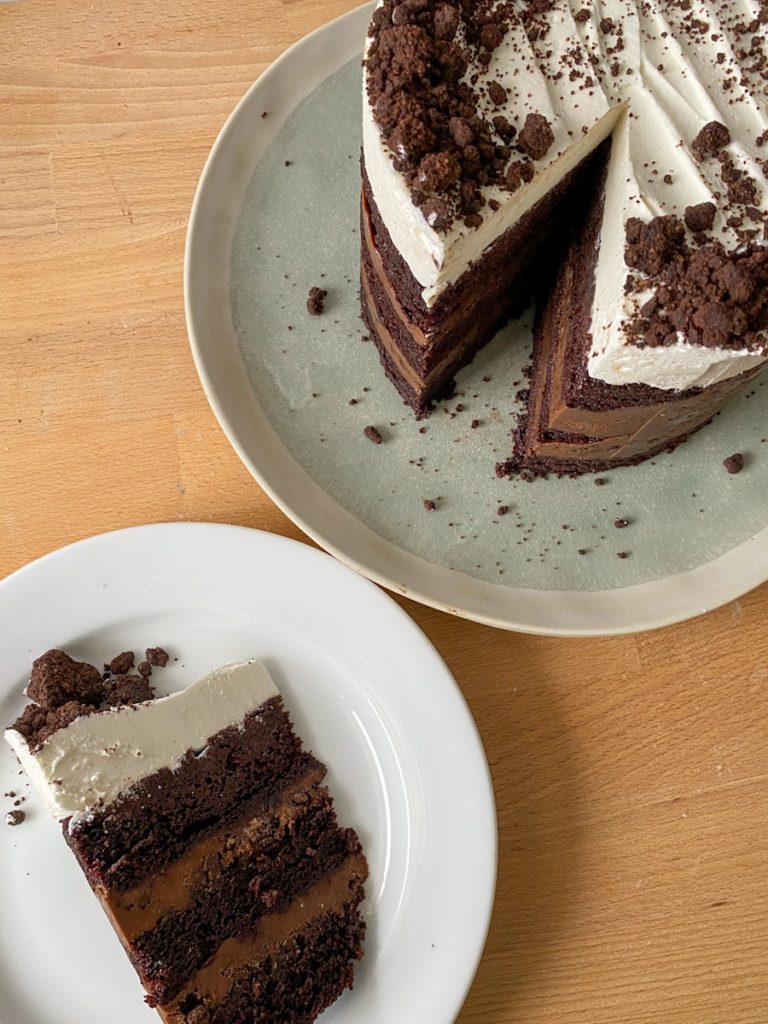
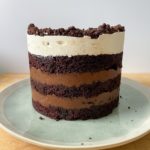
This is a rich, chocolatey cake that’s doused with a Kahlúa-coffee soak, layered with chocolate pudding and bits of chocolate crunch (think Oreo-like cookie crumbles), then topped with a thick layer of whipped cream. This cake is, in a word, dreamy.
A New (to Me) Way to Layer a Cake
In the class, we learned Christina’s method for making a layer cake, which is something I’d never tried before.
Instead of baking the cake layers in individual pans, you bake a quarter sheet cake, then cut it into your layers using a cake ring (here’s the one I bought for the class).
Then, you layer the cake and fillings inside the cake ring, using an acetate cake collar for additional height. Once you have the cake all assembled, you freeze it for 3 hours (or overnight) before removing it from the cake ring.
It results in very distinctive layers, for that clean-cut naked cake look that Milk Bar is famous for:
I totally forgot to take any photos of the layering process—sorry! Here’s a recipe for the Milk Bar Birthday Cake that shows photos of the entire assembly process.
I give instructions for each step in the recipe below, of course, but photos are helpful when you’re learning a new method.
Now, if you don’t want to go to all of that trouble, you don’t have to. You could easily bake the cake in a 9×13 cake pan, then just layer the pudding, crumb, and whipped cream on top and serve it that way. Easy peasy.
This method just makes a really fun-looking cake for those occasions when you need an over-the-top dessert.
A Few Notes for the Mud Pie Cake
This is a long, relatively time-consuming recipe (unless you go the 9×13 route, then it couldn’t be easier—see the recipe notes for those instructions). I highly recommend making it over the course of a couple of days.
You can bake the cake itself ahead of time, then wrap it tightly in 2 layers of plastic wrap and refrigerate for a day or two. You can also make the chocolate crumb and pudding ahead of time, as well as mix together your Kahlúa-coffee soak. Then, it’s just a matter of putting it together and popping it in the freezer to set.
I made my chocolate pudding from scratch from this Food & Wine recipe (I made a half batch). But you could absolutely use instant pudding or even store-bought ready-to-eat pudding if you want. If you like the taste of it, you’ll enjoy it in this cake.
I definitely recommend making your own whipped cream though. It’s SO much tastier homemade, and super simple to whip up (pun absolutely intended).
If you don’t have a quarter sheet pan, you could just use a 9×13 cake pan. But I think I use my quarter sheet pans more than any other cookie sheet I own: they’re perfect for baking a few cookies or reheating leftovers. Here’s the one I have from NordicWare if you’d like to grab one.
I used Kahlúa in my soak, because YUM. If you don’t have it or don’t like it, you could use rum or Bailey’s Irish Cream, or skip the booze altogether and try some chocolate milk. Any of those options would be delicious!
Give this decadent treat a try—I have a feeling you’ll love it as much as I do! If you have any questions, don’t hesitate to leave a comment below or DM me on Instagram at @northern.ginger.
Happy Baking!
Join my email list!
Get notified about new blog posts and receive periodic newsletters (coming later in 2021) and other updates. As a bonus, you’ll also get my FREE Chocolate Cookies & Bars eBook!
Mud Pie Cake
Equipment
- ¼ sheet pan
- 6-in cake ring
- 5-6” acetate strip
- Cardboard cake round (optional)
Ingredients
Chocolate Cake:
- 1 c + 3T all-purpose flour
- 1 ⅓ c granulated sugar
- ½ c dutch cocoa powder
- 1 ½ tsp baking soda
- ½ tsp baking powder
- ¾ tsp kosher salt
- ⅔ c buttermilk
- ⅓ c vegetable oil
- 1 egg
- 1 egg yolk
- ¾ tsp vanilla extract
- ⅔ c hot coffee
Chocolate Crumb:
- ¼ c + 2T all-purpose flour
- ½ tsp cornstarch
- ¼ c granulated sugar
- ¼ c + 2T cocoa powder
- ¼-½ tsp kosher salt to taste
- 3 T melted unsalted butter
Coffee-Kahlua Soak:
- ¼ c cold espresso or strong coffee
- 1 T + 1tsp Kahlua
Whipped Cream:
- ¾ c heavy whipping cream
- 2 tsp granulated sugar
- ½ tsp vanilla bean paste or extract
Chocolate Pudding of choice (see notes): 2 1/2-3c
Instructions
Make the cake:
- Preheat oven to 350°F
- Line the bottom of a ¼ sheet pan and spray the bottom and sides of the pan with baking spray. (Or see notes for instructions to make it in a 9×13 pan)
- In the bowl of a stand mixer fitted with a paddle attachment, add the flour, cocoa powder, sugar, baking soda, baking powder, and salt. Mix until combined.
- In a separate bowl, combine buttermilk, oil, egg, egg yolk, and vanilla and mix until combined.
- Slowly add the wet ingredients into the dry, mixing on low speed.
- Slowly pour in the coffee and continue mixing until combined, stopping to scrape the bottom of the bowl with a rubber spatula.
- Once all is well-combined, pour batter into your prepared cake pan.
- Bake for 25-30 minutes, or until a toothpick inserted into the center of the cake comes out mostly clean, with just a few moist crumbs.
- Cool completely on a wire rack.
Make the Pudding and let it chill according to package/recipe instructions.
Make the Chocolate Crumb:
- Preheat oven to 300° F. Line a ¼ sheet pan with parchment paper.
- Combine flour, cornstarch, sugar, cocoa powder, and salt in the bowl of a stand mixer fitted with the paddle attachment. Mix on low speed until well combined.
- Add the melted butter into the mixer while continuing to mix on low. Continue mixing until you see clumps start to form. Scrape the sides & bottom of the bowl to catch any lingering dry ingredients and fold them in.
- Pour the crumb mixture out onto the lined sheet pan. Spread the crumb out evenly. The biggest crumbs should be no bigger than ½-inch in diameter.
- Bake for about 20 minutes. Crumbs should contract a little to form individual boulder shapes when they’re done—if they haven’t yet, leave them in the oven for another minute or two. Allow to cool completely (it will get crunchy as it cools). Stored in an airtight container, the crumb will keep fresh for up to 1 week at room temperature or 1 month in the fridge or freezer.
Mix the soak:
- Combine the coffee and Kahlua in a small bowl. Set aside until you’re ready to construct the cake.
- Make the Whipped Cream:
- In the bowl of a stand mixer fitted with the whisk attachment, combine the whipping cream, sugar, and vanilla.
- Beat at medium-high speed until soft peaks form. Set aside until you’re ready to construct the cake.
Construct the Cake:
- Using a knife or a bench scraper, loosen the cake from the sides of the sheet pan.
- Place a piece of parchment or a cutting board on the counter and invert the cake onto it, giving your overturned pan a few taps if needed to help release the cake. Peel off the parchment.
- Use your cake ring to stamp out 2 circles from the cake, one the upper right-hand corner and one from the lower left-hand corner. These will form the top and middle layer of the cake. Make sure to plan out your circles to make sure you know exactly where to stamp before completing this step — you can mark them lightly on your sponge using your cake ring.
- Use the ring to stamp out two half-circles from the remaining sponge, which will come together to make the bottom layer of the cake. They won’t completely fill the cake ring—you’ll need some of the other scraps as well, so hang onto them.
- Clean the cake ring and place it on an 8-inch cardboard round or a plate. (keep in mind that the plate will need to fit in the freezer).
- Use 1 strip of 5-6″ tall acetate to line the inside of the cake ring. If your acetate strips are shorter than 5 inches, you can add a second one once your cake is built up high enough.
- Place the two half circles of cake together inside the ring, spongey (not browned) side up, and fill the gap between them with additional pieces of cake scraps. Use the back of your fingers to press the scraps together into a flat, even layer.
- Using a spoon or a pastry brush, splash or brush half the coffee-kahlua soak over the bottom layer of cake.
- Spread ¼ of the pudding in an even layer over the cake using the back of a small spoon (it’s a little awkward to make it fit into the acetate collar, but that will get easier with the following layers. Just spread the pudding as smoothly as you can.). Use figure-8 motions and try to not pick up your spoon as you work.
- Sprinkle ⅓ of the crumb evenly over the frosting, using the smaller pieces of crumb. You’ll want to save the bigger pieces of crumb for the top of the cake. Lightly press the crumbs into the frosting using the back of your fingers.
- Spread another ¼ of the pudding as evenly as possible over the crumb. It’s ok if it doesn’t completely cover the crumb.
- Place your middle cake layer on top, passing it through the acetate collar at an angle to help nestle it into place. If one of the two cake rounds left looks nicer, save it for the final layer and use the other one in the middle. If you’re using two shorter pieces of acetate, you can now add your second piece. Gently tuck a second strip of acetate between the cake ring and the top of the first strip of acetate, so that you have an acetate collar that is 5-6 inches tall.
- Repeat the process of splashing or brushing the layer with the remaining soak, spreading it with ¼ of the pudding, sprinkling ⅓ of the crumb (still reserving the biggest ones for the top), and finishing with another ¼ of the pudding.
- Nestle the remaining cake round onto the frosting.
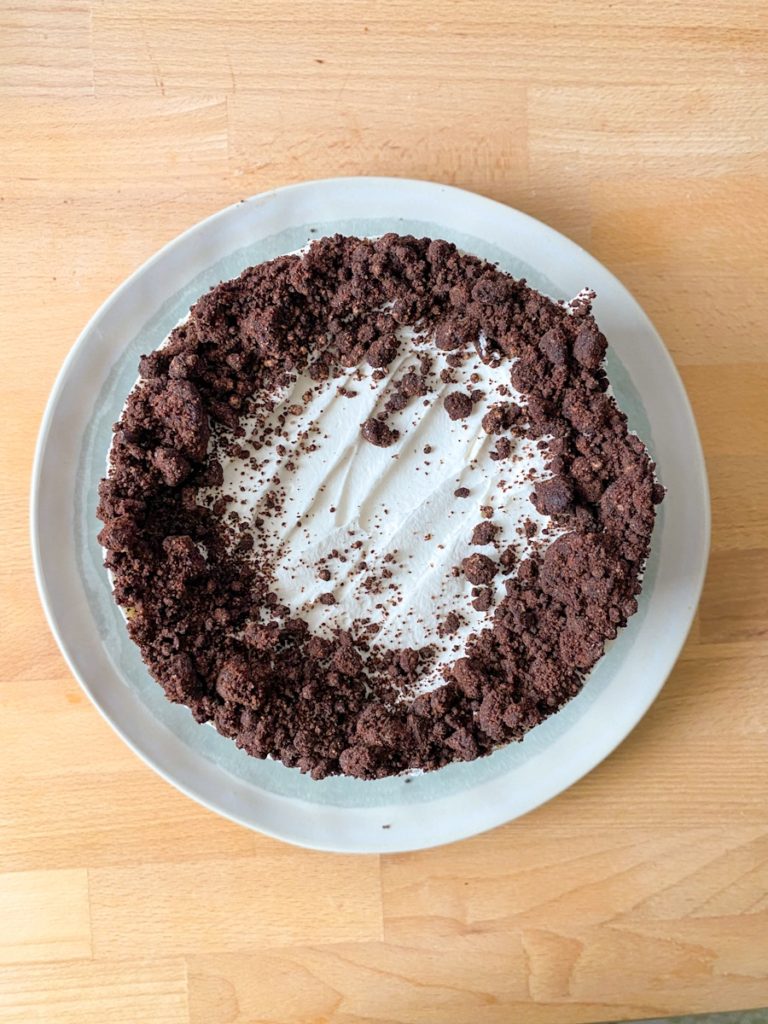
- Pile the whipped cream on top of the cake and spread evenly.
- Garnish the top of the cake with the remaining crumbs
- Transfer the cake to the freezer and freeze for a minimum of 3 hours or overnight to set the cake and filling. The cake can keep in the freezer for up to 2 weeks (but you’ll want to wrap it once it’s frozen if you’re going to keep it frozen that long).
- At least 3 hours before you’re ready to serve the cake, pull it out of the freezer and slide off the cake ring. If you need to, use your fingers and thumbs gently push the cake out of the ring from the bottom.
- Gently peel off the acetate and transfer the cake to a platter, cake stand, or whatever you want to serve it on. Let it defrost for 2-3 hours, then slice and serve!
Notes
1. Spray a 9×13 cake pan with baking spray, or butter and flour it. 2. Preheat the oven and mix up the cake batter as instructed above. Pour the batter into the prepared pan. 3. Bake as instructed above. Let cool completely. Leave the cake in the pan. 4. Spread HALF of the pudding onto the cake. 5. Sprinkle ⅔ of the crumb onto the pudding, using the back of your hand to gently press the crumb into the pudding. 6. Spread the remaining pudding on top of the crumb. Spread it as evenly and smoothly as you can. 7. Chill the cake for an hour. (This will help make it easier to spread the whipped cream on top without getting pudding or crumbs mixed into it). 8. Pull the cake out of the fridge and spread all of the whipped cream on top. 9. Use the remaining crumbs to decorate the top of the cake. 10. Refrigerate or freeze until ready to serve. If frozen, allow cake to come to room temperature before serving (about 2-3 hours).


2 Comments
Pingback:
Pingback: