
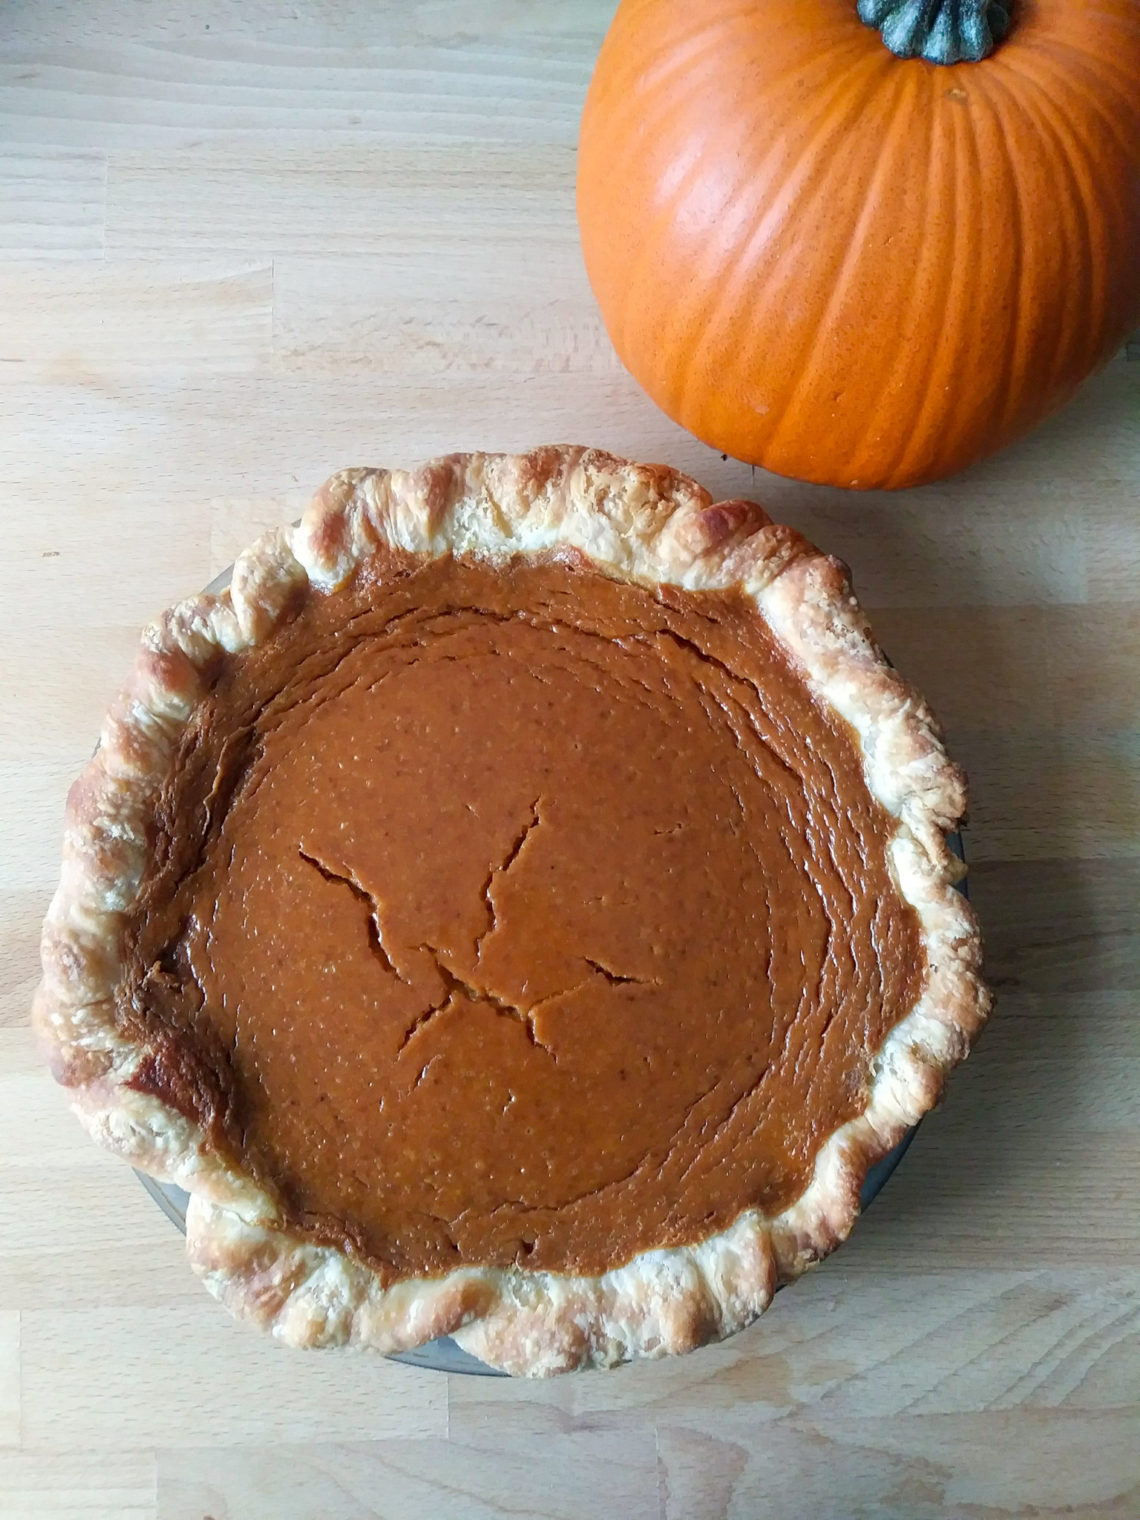
Etta’s Pumpkin Pie
My Grandma made the BEST pumpkin pie. Seriously. I know everyone says their Grandma/Mom/Dad/Aunt/Uncle/whoever makes the best one, but I’m telling you hers trumps them all. This pie has convinced even the biggest pumpkin pie haters – it’s that good. Pie Month would not be complete without this recipe.
I’m not even sure exactly what makes it so good – there are no crazy ingredients or fancy techniques involved. It just has the perfect flavor blend of molasses-tinged custard, pumpkin, and spices. It tastes like Thanksgiving, family gatherings, and the best holiday memories.
And the best part about it? It’s super simple, quick to throw together, and best if made the day before you eat it. Everything we need in a holiday dessert.
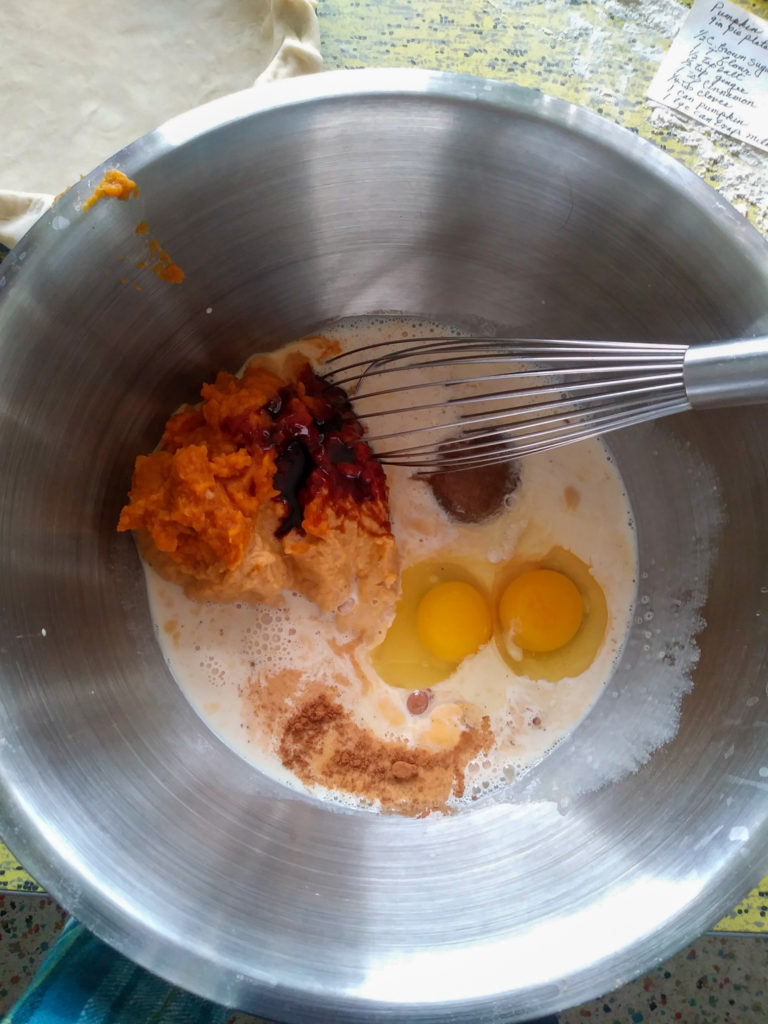
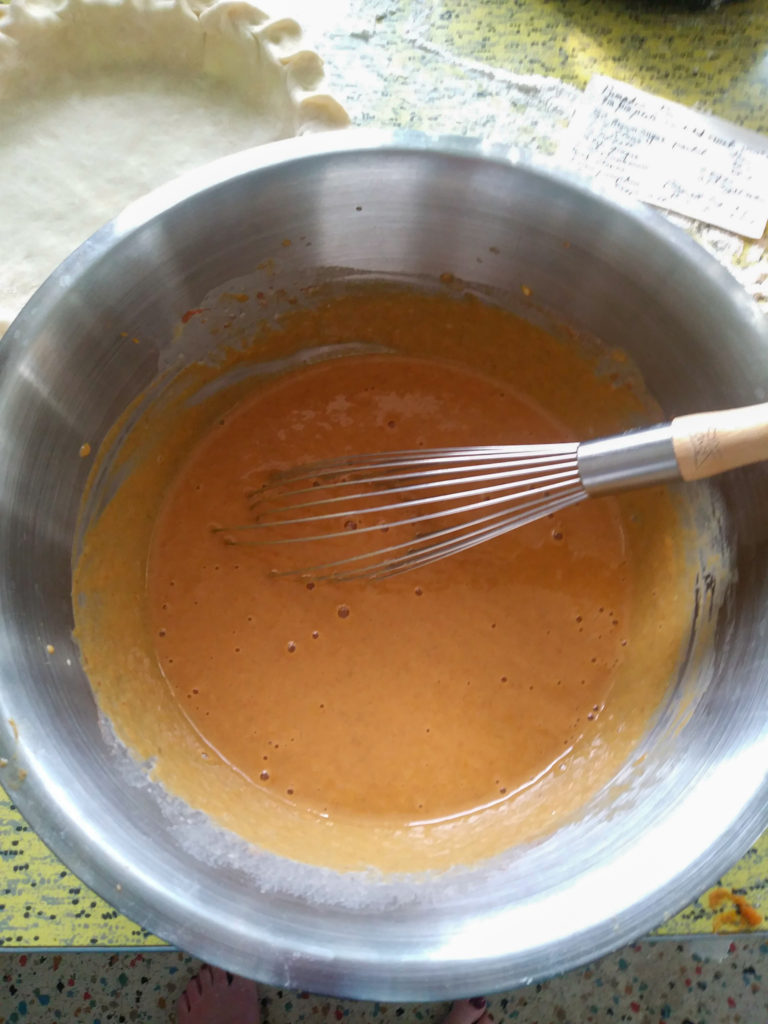
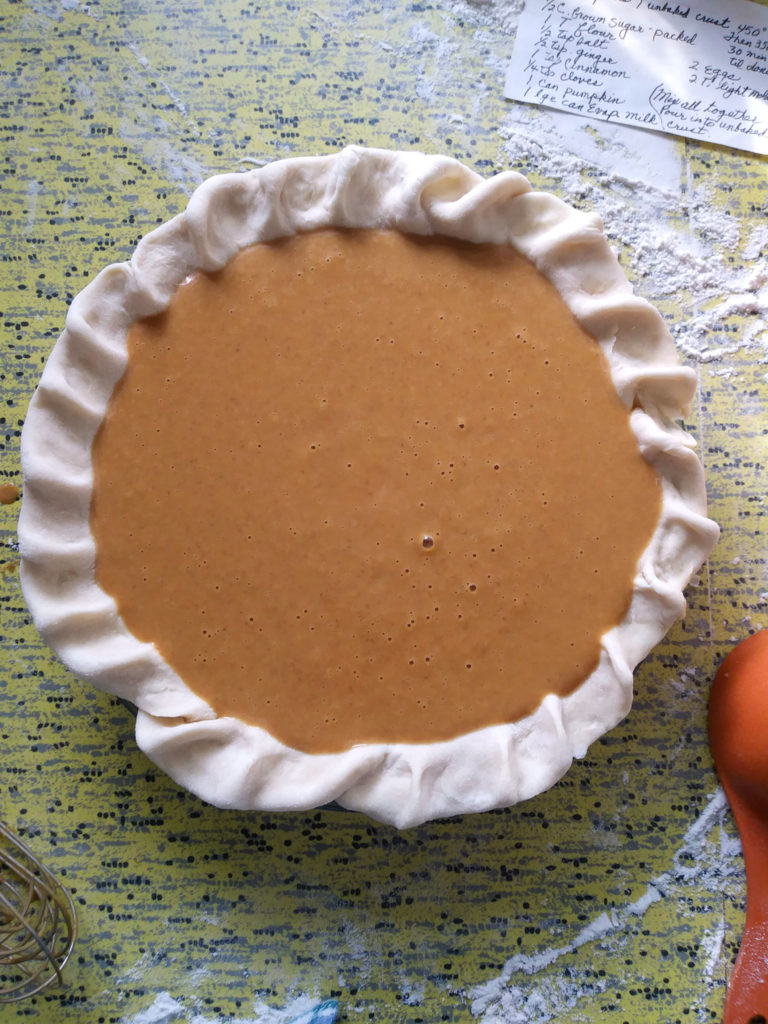
The filling whips up in just a few minutes – toss all of the ingredients into a large mixing bowl and whisk until well combined and smooth. Then pour it into your pie crust and bake!
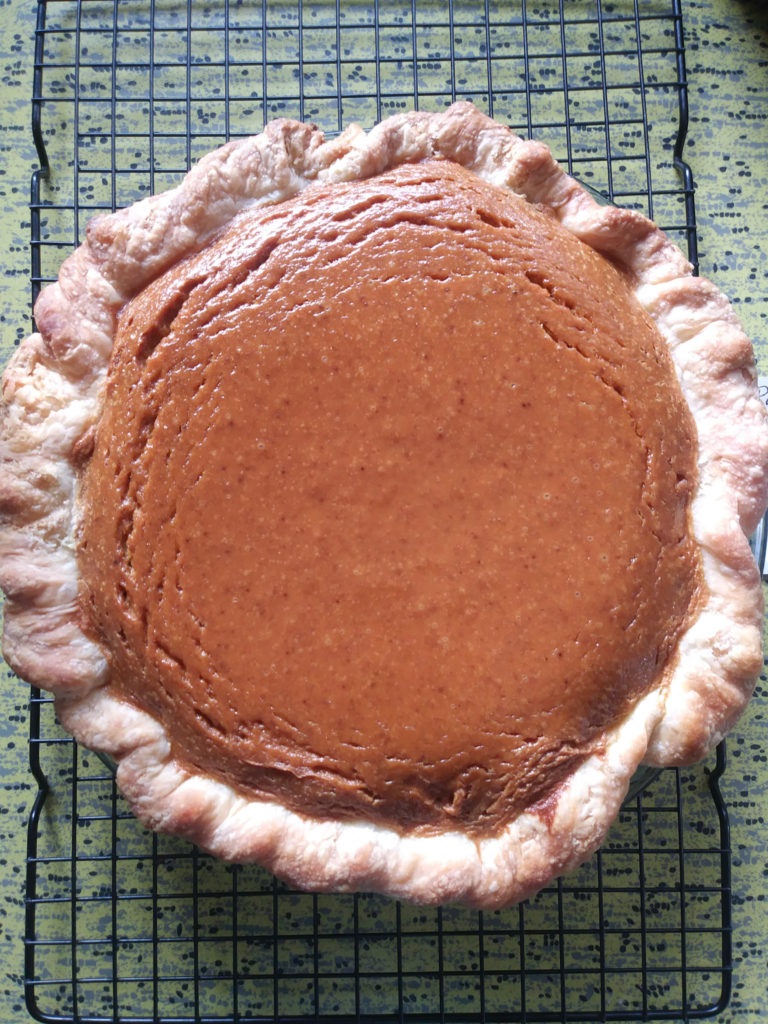
One thing that’s a little different about this pie is the oven temperature. You start it baking at 450°F for just 10 minutes. Then, with the pie still in the oven, you lower the temp to 350°F and bake for another 30 minutes or so. The center of the pie will be set. To test this, jiggle the pie a little – if the filling “jiggles” as one unit (kind of like jello does), it’s done. If it still moves more like liquid in the center, it needs a bit longer.
Pumpkin Pie Crust Options
My grandma always made this pie with a traditional pie crust, and it’s absolutely delicious that way. However, it would also be fantastic in a graham cracker crust, like this one in my Banoffee Pie recipe. Or you could sub ginger snap cookies (the crunchy ones) for the graham crackers in that recipe and make a ginger snap crust!
If you want a gluten-free option, you could make a cookie crumb crust with gluten free ginger snaps, like these made by Mi-Del. Then sub corn starch or another similar thickener for the flour in the pie filling (though I’d use a little less corn starch – like 1 1/2-2 tsp instead of the full Tbsp – as corn starch is a more powerful thickener than flour). Full disclosure: I haven’t tried using either the gluten free ginger snaps or the corn starch substitution, but both should work great. If you try it, let me know how it turns out!
Whether you make it as the recipe states, or try your hand at a graham cracker crust or a gluten-free option, this pumpkin pie will be a great addition to your holiday table. I know I’ll be making one, and thinking of my Grandma Etta with every bite.
Happy Baking everyone, and Happy Holidays!

Etta’s Pumpkin Pie
Equipment
- 9-inch pie pan
- Rolling Pin
Ingredients
For the Crust:
- 1 1/4 c flour
- 1/4 tsp salt
- 1 T sugar
- 1/2 c cold butter (1 stick), cut into small chunks
- 3-5 T cold water
- flour to roll out
For the Filling:
- 1/2 c brown sugar, packed
- 1 T flour
- 1/2 tsp salt
- 1/2 tsp ginger, ground
- 1 tsp cinnamon
- 1/4 tsp cloves
- 1 can pumpkin puree, 15oz, or about 1 3/4 c
- 1 can evaporated milk, 12oz
- 2 eggs
- 2 T molasses
Instructions
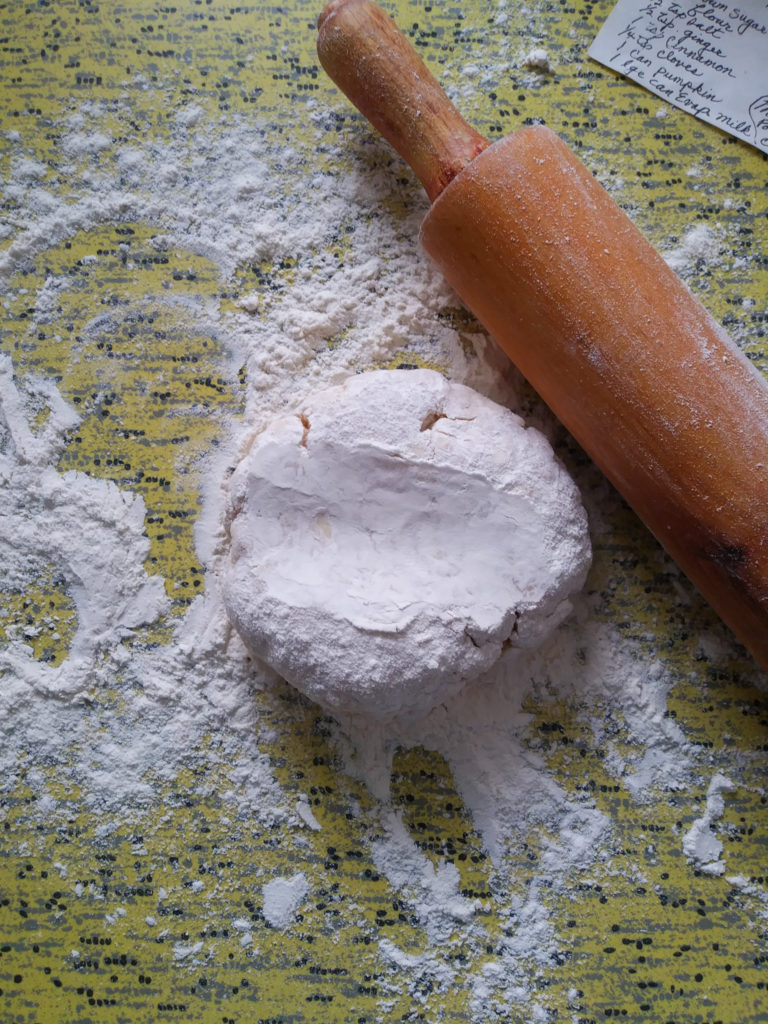
For the Crust:
- In a large bowl, combine flour, salt, and sugar.
- Using your hands, massage butter into the flour mixture until butter chunks are about pea-sized (or slightly bigger).
- Drizzle cold water into the butter-flour mixture 1 T at a time, gently mixing with a fork or hands as you go.
- Once your dough gets to the point where all flour is moistened and it's starting to come together, press together GENTLY to form a ball. Make sure not to overwork the dough – you want those butter chunks to stay cold!
- Wrap or cover dough and chill for 1 hour. (You can do this part ahead of time, wrap dough tightly in plastic wrap, place in an airtight container, and refrigerate overnight or freeze for up to a month.)
- Once dough is chilled, roll out on a floured surface to a roundish shape about 1/8" thick. Place in the bottom of your pie pan and trim the edges so you have about a 1" overhang. Fold the overhang under so you have a clean, thick edge, and crimp as desired. Pop it in the fridge while you make the filling.
For the Filling:
- Preheat oven to 450°F
- In a large mixing bowl, combine all filling ingredients.
- Using a whisk, mix until well combined and smooth.
- Pour into prepared pie crust. Note: batter will be VERY liquid. Be careful when moving the pie to the oven.
- Bake at 450°F for 10 minutes, then, with the pie still in the oven, lower the temp to 350°F.
- Bake for another 30 minutes, or until center is set. Jiggle the pie a bit to check – the filling will jiggle as one unit, and will no longer be liquidy in the center. If it's still liquidy, give it more time in the oven, checking every few minutes.
- Move pie to a cooling rack and allow to cool completely.
- Wrap with plastic (or cover with a lid if your pie pan has one), pulling the plastic tight so it doesn't touch the filling. Move to the refrigerator to chill. This pie is best if refrigerated for several hours or overnight before eating.
- Serve topped generously with whipped cream. (The maple whipped cream in my Maple Pecan Pie recipe is the BEST with this pumpkin pie!)
- Stored loosely wrapped or covered in the refrigerator, pie will stay fresh for 3-4 days.


8 Comments
Pingback:
Pingback:
Pingback:
Pingback:
Pingback:
Lindsey
This pumpkin pie recipe is delish!
I highly recommend!
I made one…then simply had to make another.
Thank you Norther Ginger! ❤️
Jamie
I’m so glad you liked it! My grandma would be happy to know you’re enjoying her pie! ♥️
Pingback: