
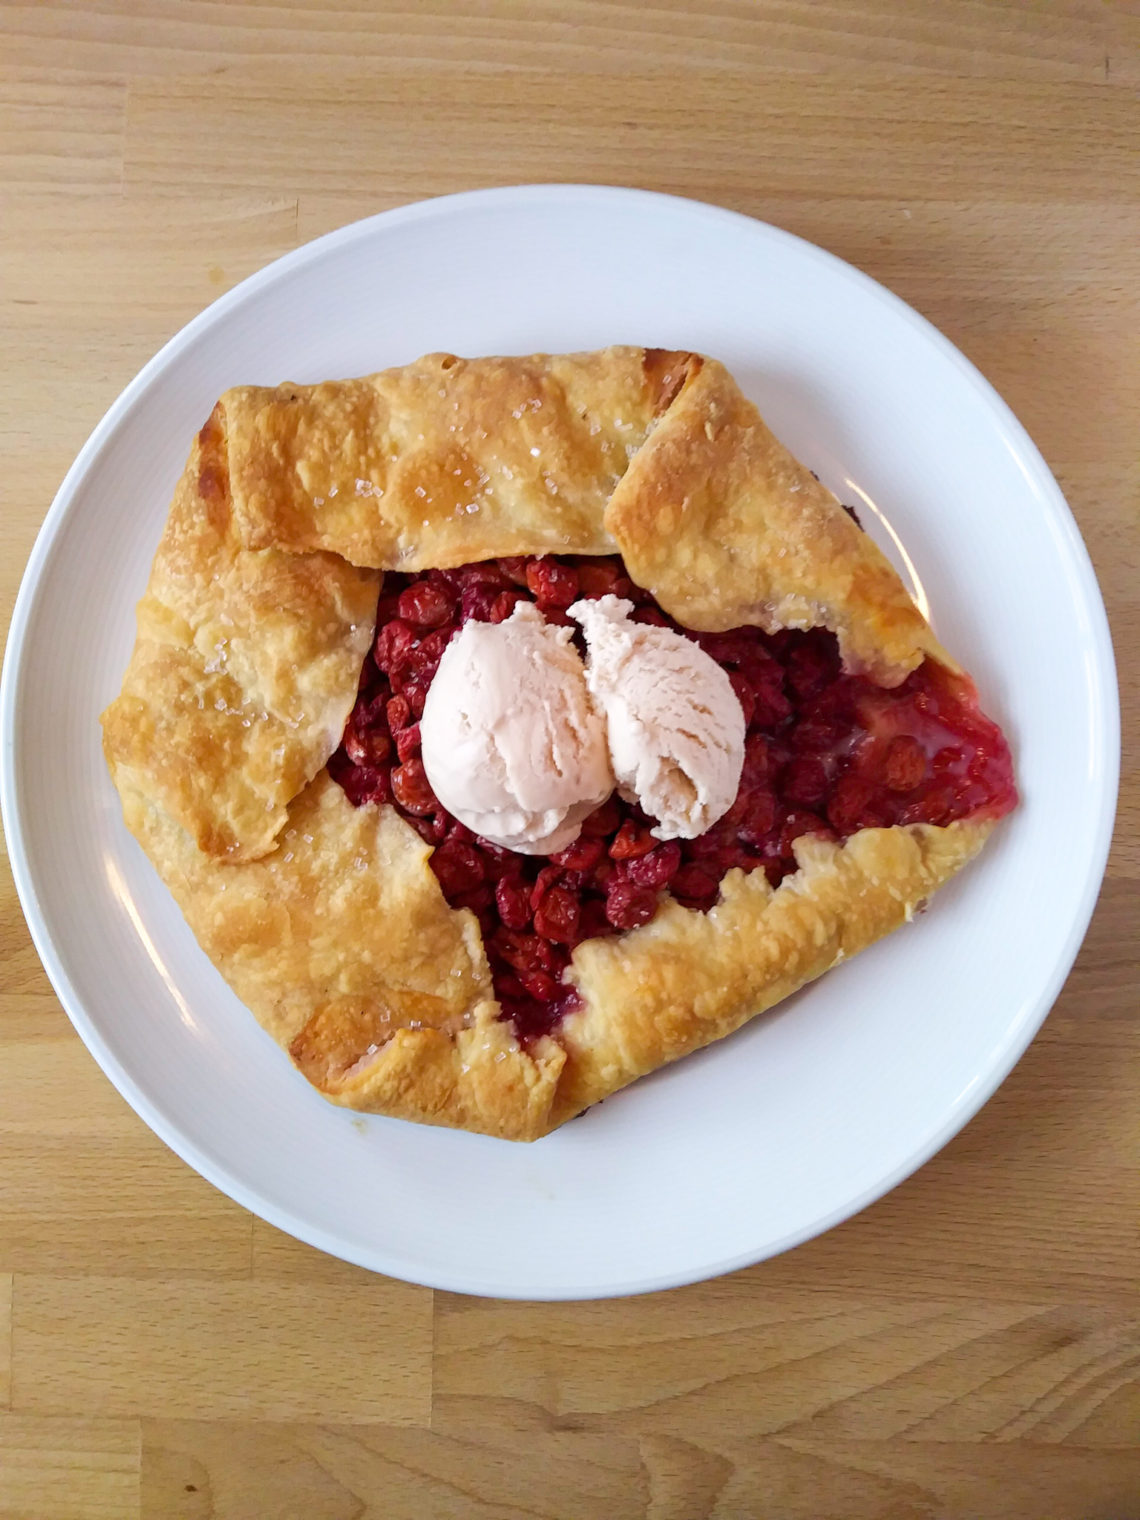
Sour Cherry Galette
Summer is full of amazing flavors and seasonal fruits, veggies, and flowers. Since I live in a place where the growing season is extremely short, I am frantic to capture these flavors before they’re gone. For me that means a bevy of jams, sauces, cakes, and my personal favorite – PIES. This Sour Cherry Galette is a prime example.
It’s not quite sour cherry season here in Duluth (I think that comes in a few weeks) but I had some in the back of my freezer that needed to be used up. That’s one problem with trying to preserve all of those seasonal fruits – my freezer ends up full of them and I forget what’s in there! I decided the best way to put my cherries to good use was to toss them into a quick galette.
Never heard of a galette? I hadn’t either, before I made my first one. A galette is a rustic, free-form, one-crust pie. You can make it sweet or savory, and it’s the easiest and quickest way to make a pie. Plus, it’s SUPPOSED to look rustic (a.k.a. messy), so there’s no pressure to make it pretty. All you need is a pie crust and your favorite filling, and bing-bang-boom, you have pie!
A Few Notes…
- Pie Crust: Don’t want to make your own? Go ahead and buy one from the store – I won’t judge. If you want to make one, check out my favorite pie crust recipe in my Rhubarb Custard Pie post here.
- My cherries were a tad freezer burnt – I don’t recommend that for the best pie. It turned out ok, but fresh cherries would have been AMAZING (or ones frozen more recently than 2017:)). If you’re lucky enough to have a cherry tree, this is a great way to use up some of your harvest! (And if you’re a Duluth local and want to share, I’ll gladly trade baked goods for cherries!)
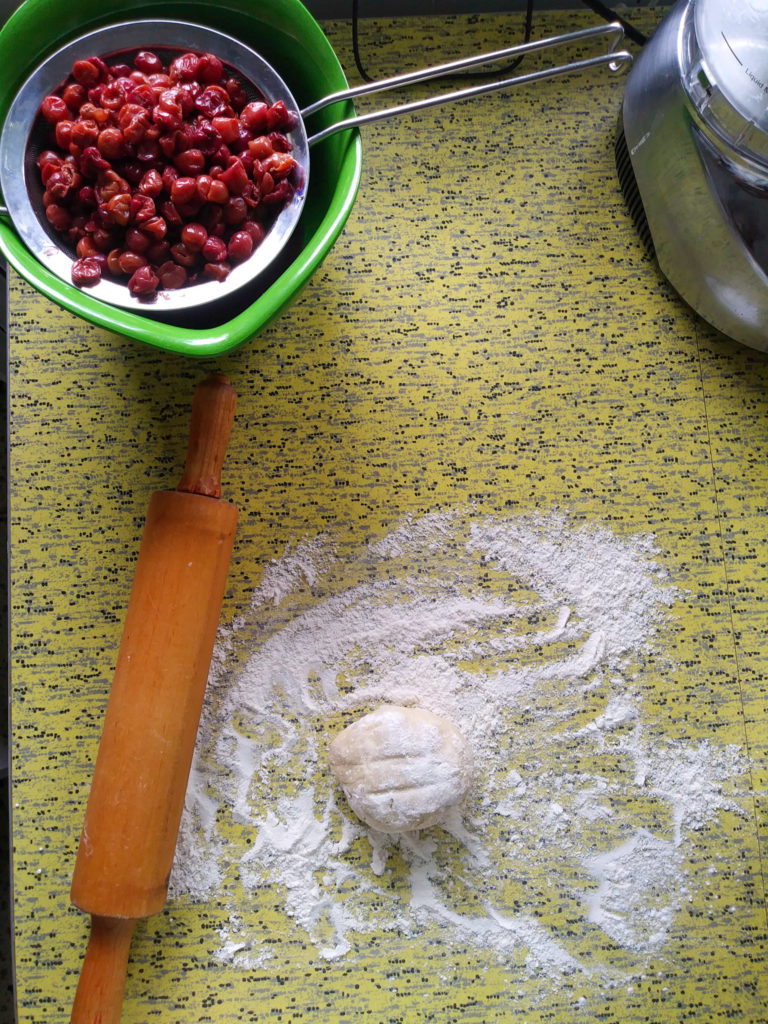
- If you do use frozen cherries, thaw & drain them well before mixing with the sugar mixture. I use a wire mesh strainer over a bowl to drain them.
- Make sure your cherries are pitted. Need a good cherry pitter? Oxo makes a great one.
- If you end up with a lot of juice in your filling, use a slotted spoon to move the cherries onto the pie crust, then pour a little of the juice over them. Just make sure the cherries are coated in the sugary juices – otherwise you’ll end up with a VERY sour pie.
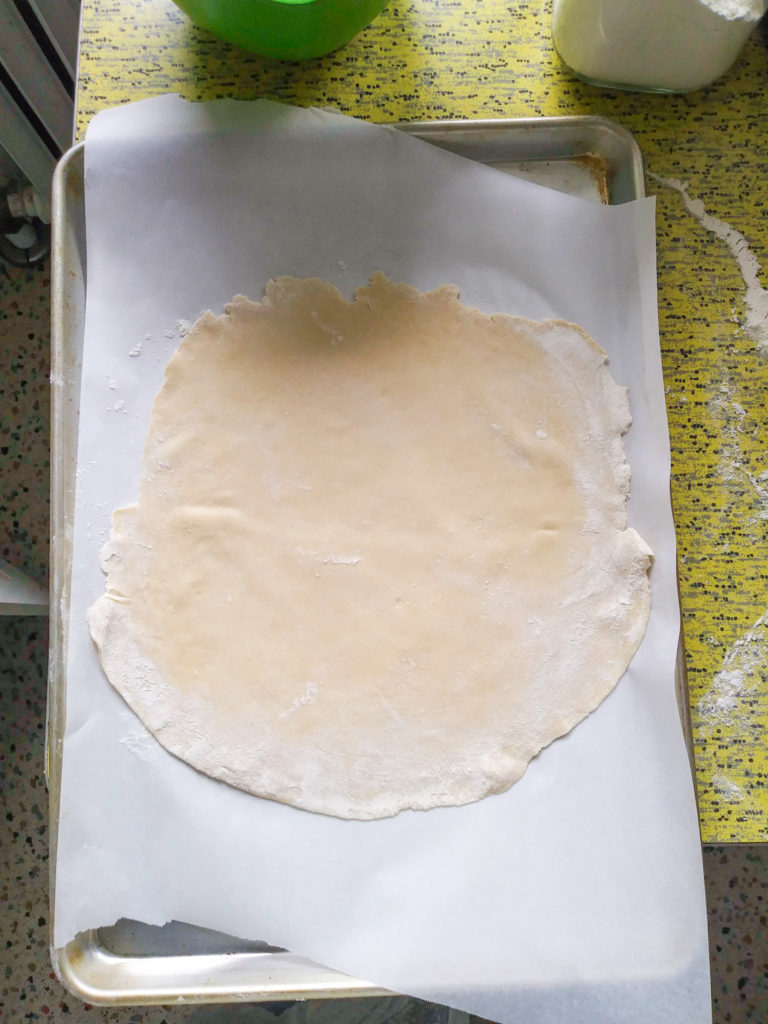
- Bake your galette on some parchment paper in case the filling leaks out. Also, use a rimmed cookie sheet to keep the leaks from spilling onto the bottom of your oven.
- I kept this recipe simple, just adding sugar and vanilla to the cherries. If you want to spice it up a little, try adding some lemon or orange zest, cinnamon, or even almond extract in place of the vanilla!
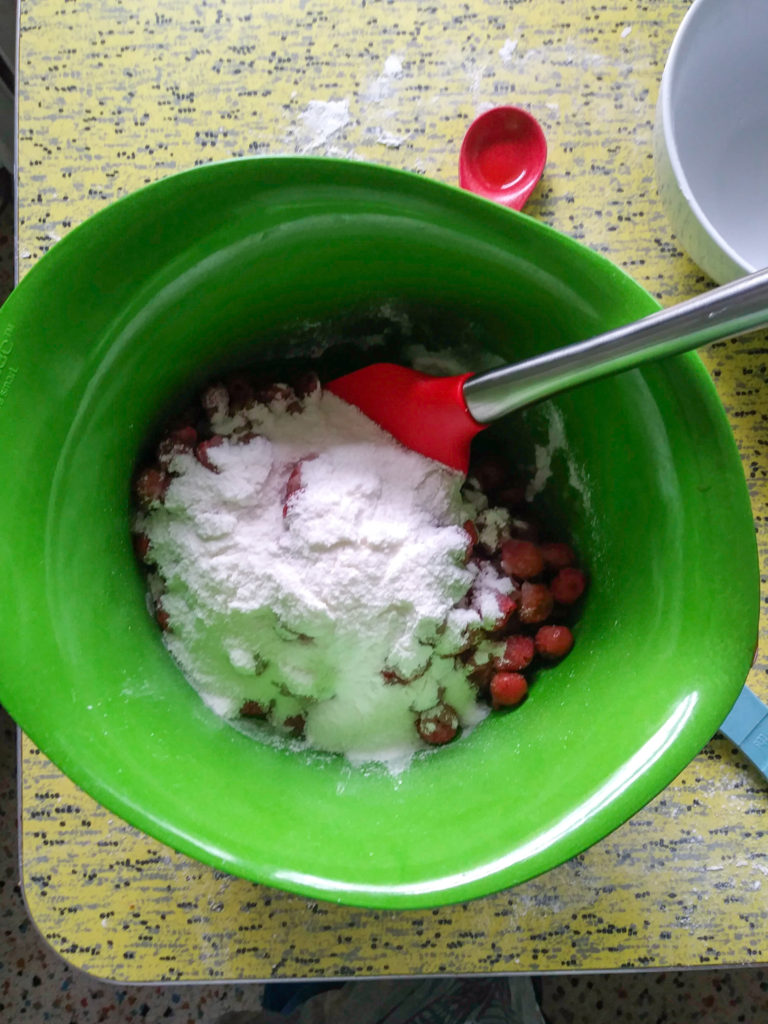
- I used corn starch to thicken the filling, but you can use potato starch, tapioca starch, or flour instead.
Questions?
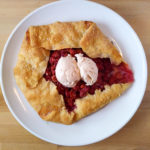
Leave a comment below and I’ll be happy to answer. Otherwise, bring this Sour Cherry Galette to your next BBQ along with some vanilla ice cream, and wow your friends with your baking prowess.
Enjoy!
Sour Cherry Galette
Ingredients
- 1 pie crust, unbaked
- 5 c sour cherries, pitted, fresh or thawed from frozen & drained.
- 1 tsp vanilla extract
- 3/4-1 c sugar
- 3 T corn starch
- pinch salt
- 2 T cold butter, cut into small pieces
Instructions
- Preheat oven to 425°F.
- Roll out pie dough to a 12-inch round. Place on a parchment-lined cookie sheet.
- Mix together sugar, corn starch, and salt. Set aside.
- In a large bowl, mix cherries & vanilla extract. Then add sugar mixture and mix until all cherries are covered.
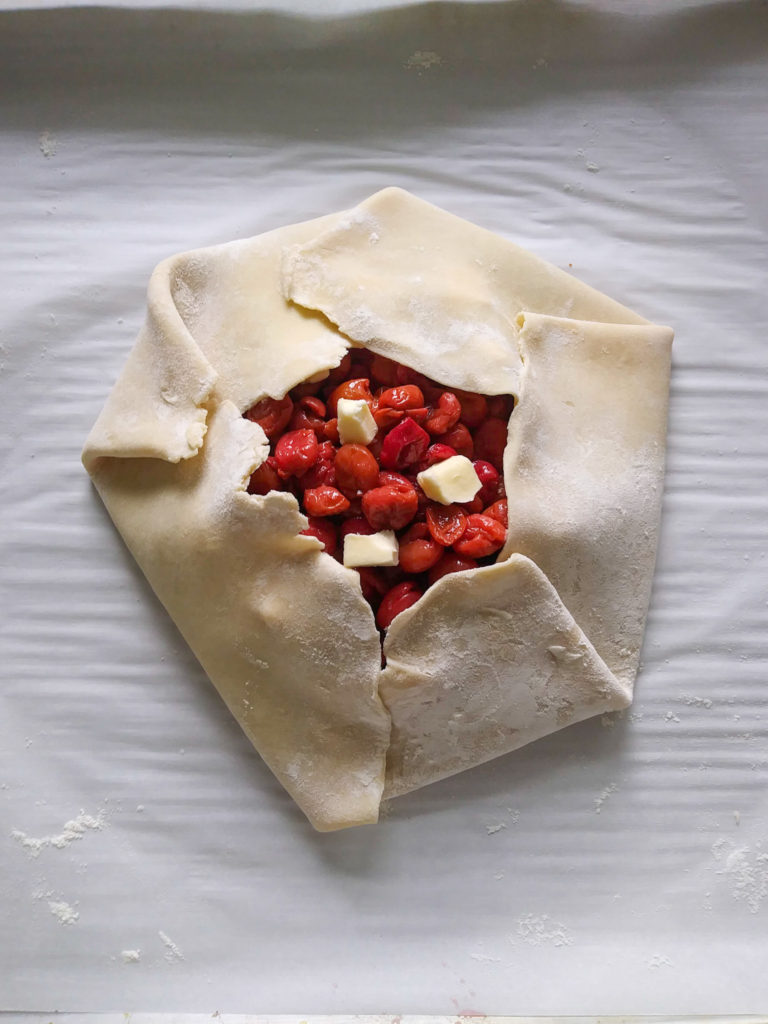
- Pile cherry mixture onto the center of the pie dough round, leaving a good 2+ inches of dough around the edges. Dot cherries with the butter pieces.
- Fold edges of pie dough over the cherries. It won't cover the cherries completely – you want a good-sized hole in the middle for the cherries to peek through.
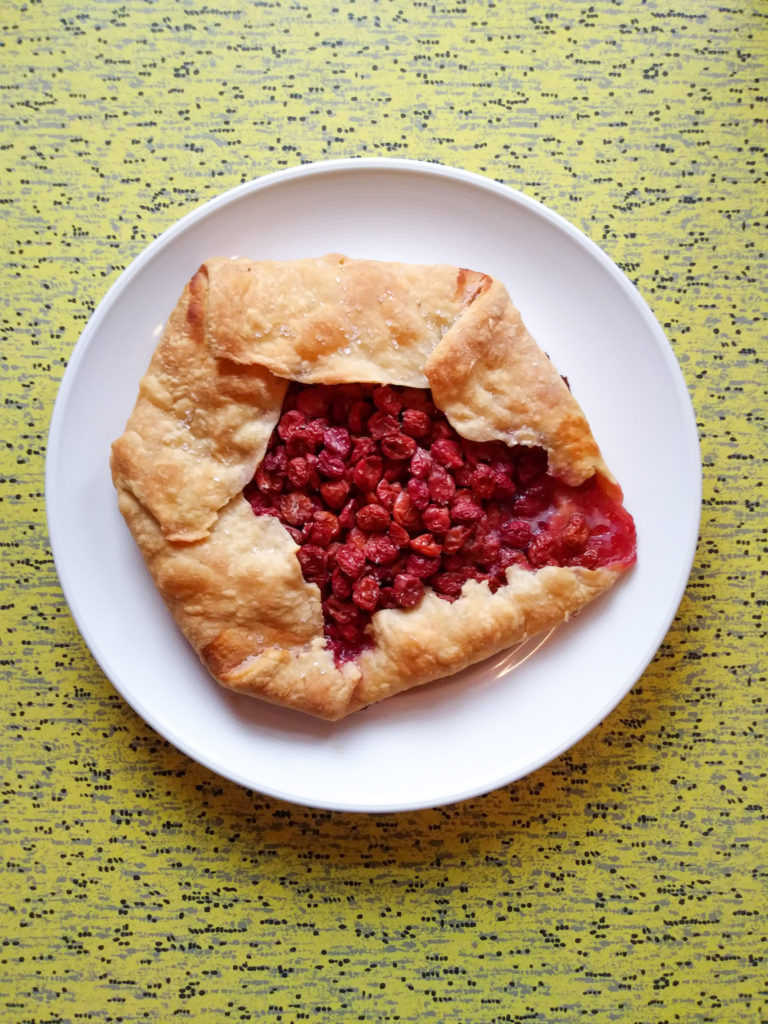
- Bake on lower rack of preheated oven for 15 minutes, then lower the temperature to 375°F. Bake for another 20-30 minutes, or until crust is nicely browned and filling is bubbling nicely. Check periodically to make sure the crust edges aren't browning too much – if they're getting too dark, cover with strips of aluminum foil.
- Cool on the cookie sheet on a wire rack for about 20 minutes or so. Slice and serve topped with vanilla ice cream. YUM.
Notes


2 Comments
Pingback:
Pingback: